
This Blog teaches you how to use Ruby and Jekyll to build your own Blogsite.
This tutorial will show you how to build a static page website using Jekyll and Ruby hosted on Github-Pages. I will be using “jekyll-theme-chripy” as a styling template, but you may use any theme of your choice. Find more themes here I will also talk about some of the bugs you may face while setting up your machine for local and dynamic development.
Prerequisites
Follow the instructions in the Jekyll Docs to complete the installation of Ruby, RubyGems, Jekyll, and Bundler. In addition, Git is also required to be installed.
Installation
Creating a New Site
There are two ways to create a new repository for this theme:
- Using the Chirpy Starter - Easy to upgrade, isolates irrelevant project files so you can focus on writing.
- Forking on GitHub - Convenient for custom development, but difficult to upgrade. Unless you are familiar with Jekyll and are determined to tweak or contribute to this project, this approach is not recommended.
We’ll be using Option 2 - GitHub Fork
Fork Chirpy on GitHub and rename it to <GH_USERNAME>.github.io.
And then execute:
1
$ bash tools/init.sh
The above command will clean uffffp unneeded files from your repository, and automatically create a new commit.
Installing Dependencies
Before running for the first time, go to the root directory of your site, and install dependencies as follows:
1
$ bundle
Usage
Configuration
Update the variables of _config.yml as needed. Some of them are typical options:
urlavatartimezone(Find your timezone here)]lang
Running Local Server
You may want to preview the site contents before publishing, so just run it by:
1
$ bundle exec jekyll s
Or run the site on Docker with the following command:
1
2
3
4
$ docker run -it --rm \
    --volume="$PWD:/srv/jekyll" \
    -p 4000:4000 jekyll/jekyll \
    jekyll serve
After a while, the local service will be published at http://127.0.0.1:4000. 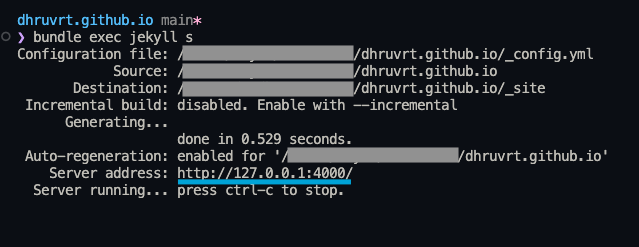
Deployment
Before the deployment begins, check out the file _config.yml and make sure the url is configured correctly. Furthermore, if you prefer the project site and don’t use a custom domain, or you want to visit your website with a base URL on a web server other than GitHub Pages, remember to change the baseurl to your project name that starts with a slash, e.g, /project-name.
Now you can choose ONE of the following methods to deploy your Jekyll site.
Deploy Using GitHub Actions
Ensure your Jekyll site has the file .github/workflows/pages-deploy.yml. Otherwise, create a new one and fill in the contents of the sample file, and the value of the on.push.branches should be the same as your repo’s default branch name. And then rename your repository to <GH_USERNAME>.github.io on GitHub.
Furthermore, if you have committed Gemfile.lock to the repository and your local machine is not Linux, go the the root directory of your site and update the platform list:
1
$ bundle lock --add-platform x86_64-linux
Now publish your Jekyll site:
Browse to your repository on GitHub. Select the tab Settings, then click Pages in the left navigation bar. Then, in the Source section (under Build and deployment), select GitHub Actions from the dropdown menu.
Push any commit to remote to trigger the GitHub Actions workflow. In the Actions tab of your repository, you should see the workflow Build and Deploy running. Once the build is complete and successful, the site should be deployed automatically.
Visit your website at the address indicated by GitHub.